Creativity with Google Drawings
A handout of this page can be found as a Google Doc > Creativity with Google Drawing
With Google Drawing, you can create, edit, and share drawing online. There are three basic ways to use Google Drawings in the Classroom.
1. Give Students ready-made activities
2. Have students fill in templates the teacher creates
3. Let students create drawings from scratch
Google Drawings
Drawings allows users to collaborate and work together in real time to create web maps, concept maps, flow charts, organizational charts, graphic organizers, image maps, and more.

1. Give Students ready-made activities
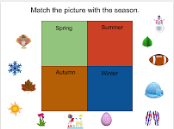
Students can drag and drop objects, connect objects to complete a web map, add color to shapes, and more.
2. Have students fill in templates the teacher creates
Students can interact with Google Drawings a little bit more than just a drag and drop activity. Students can add text, images, and color.

3. Let students create drawings from scratch
The possibilities are endless for students to create their own drawings. Some suggestions.
- Graphic Organizers
- Comic Strips
- Posters
- Image Maps
- Timelines
- Tutorial Graphics
Insert Drawing into other documents.
A few ways to do this.
1. Download - Under the File menu, select Download As and select 1 of the 4 choices (PNG image probably best for most situations).
2. Copy and Paste (sort of) - Under the Edit menu, select Web clipboard and Copy entire drawing to web clipboard. Then in your Google Doc or Slides, select the Edit menu, Web Clipboard, and select your Drawing.
3. Publish to the Web - Under the File menu, select Publish to the Web
Link - allows image size and gives a link to place on a website or social media
Embed - allows image size and gives embed code to insert into the HTML of a webpage
Create an Image Map
- In a new Drawings add an image:
- Either Click Insert then Image and upload or search for an image.
- Or Click Tools then Research to search for the image and drag and drop the image into your Drawing
- Resize your Drawing to match your image.
- Add the Shapes to the different parts of your image.
- Remove the fill color by setting the fill to transparent.
- Remove the border by setting the border to transparent.
- With the shape selected, select the link icon.
- *Type or Paste the URL Link into the box and click the Apply button.
- Repeat these steps to other parts of the image.
- Link to or Embed your Image map to a Website or other online resources that allows embed codes.
*Students can link to other Google Documents, Web Pages, YouTube / online videos, images and more.
Handy Tips
- Hold down the SHIFT key as you resize objects to keep the ratio aspect.
- Click and drag the right lower corner of the canvas to resize the canvas.
- Use Page Setup, under the File menu, to set the canvas to Standard, Widescreen, or a Custom size.
- The Arrange menu allows users to center objects on a page, align objects, order objects that overlap, and group objects together.
Good Resources
Using Google Drawings - Eric Curts Handout
Magnetic Poetry with Google Drawings - Shake Up Learning - Kasey Bell
Pattern Blocks with Google Drawings
Pattern Blocks with Google Drawings
No comments:
Post a Comment